
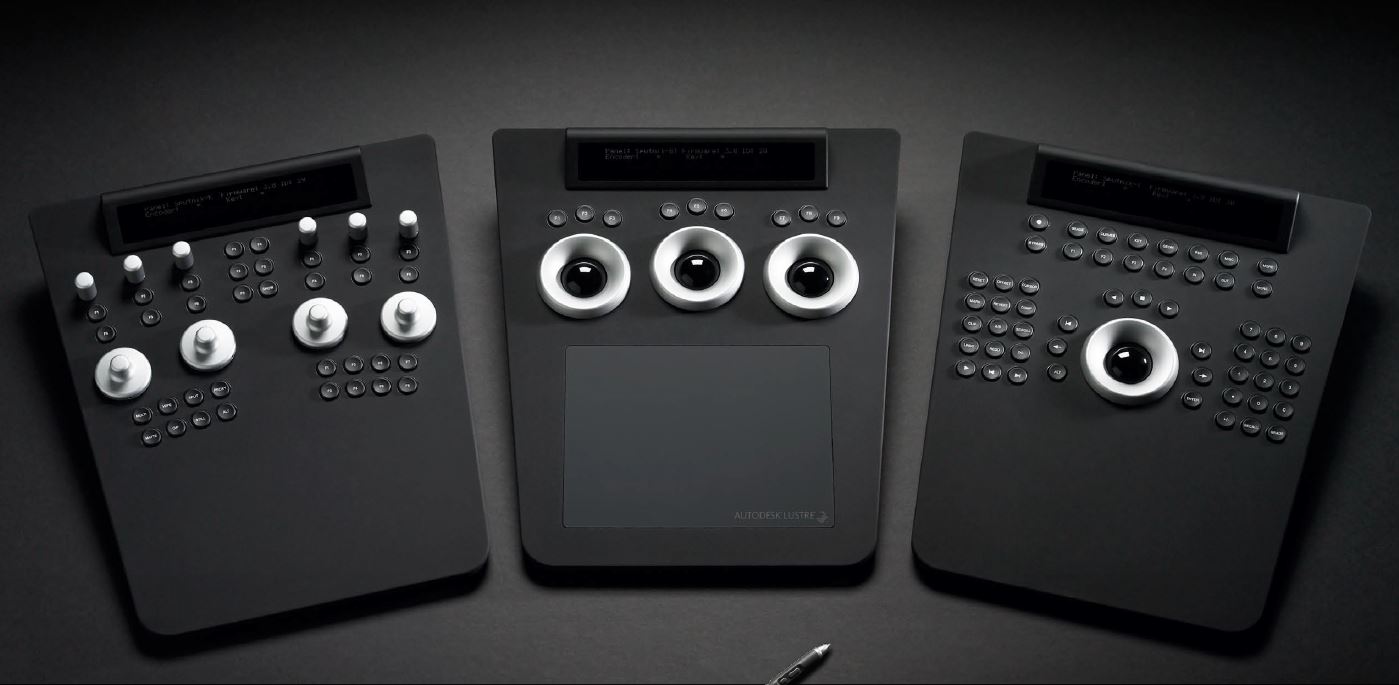
New mint condition ACS panel in stock!
19. October 2019
Fun with Colors!
6. January 2020Illuminating the Element Panels

Hi friends,
every now and then a little fun project is in order.
This time, we wanted to have another try illuminating the buttons on Tangent’s Element panel.
The idea was fairly straight forward: Print the button caps out of translucent material und pull in a USB LED strip.
And the best of all: You can download the 3D-file for free to print keycaps of any color yourself.
Just fill out the form below to receive the download link and go printing.
Note: By filling out this form, you’re giving explicit consent for us to store your name and email-address.
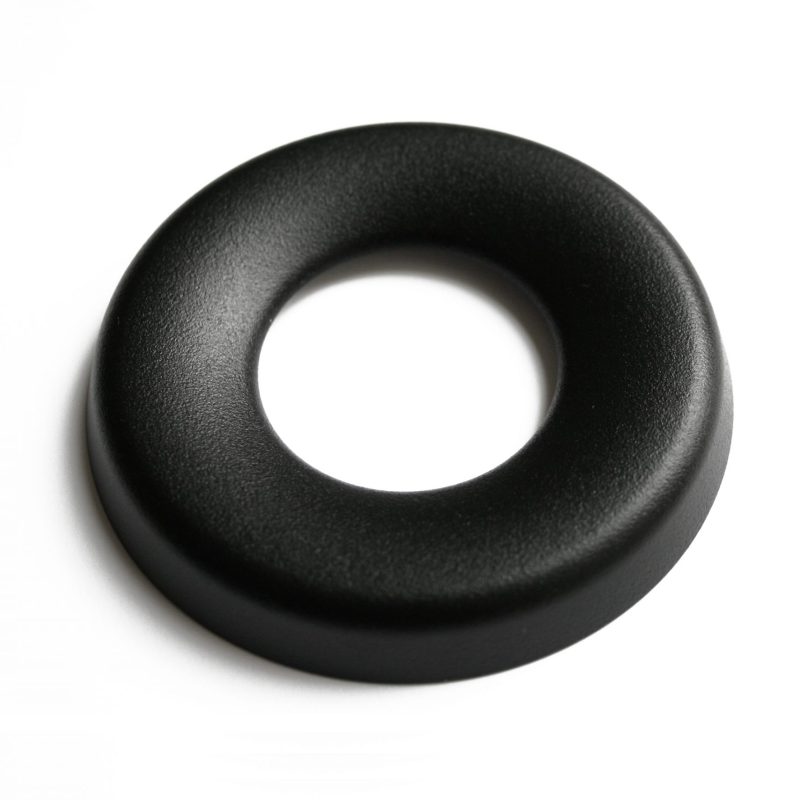
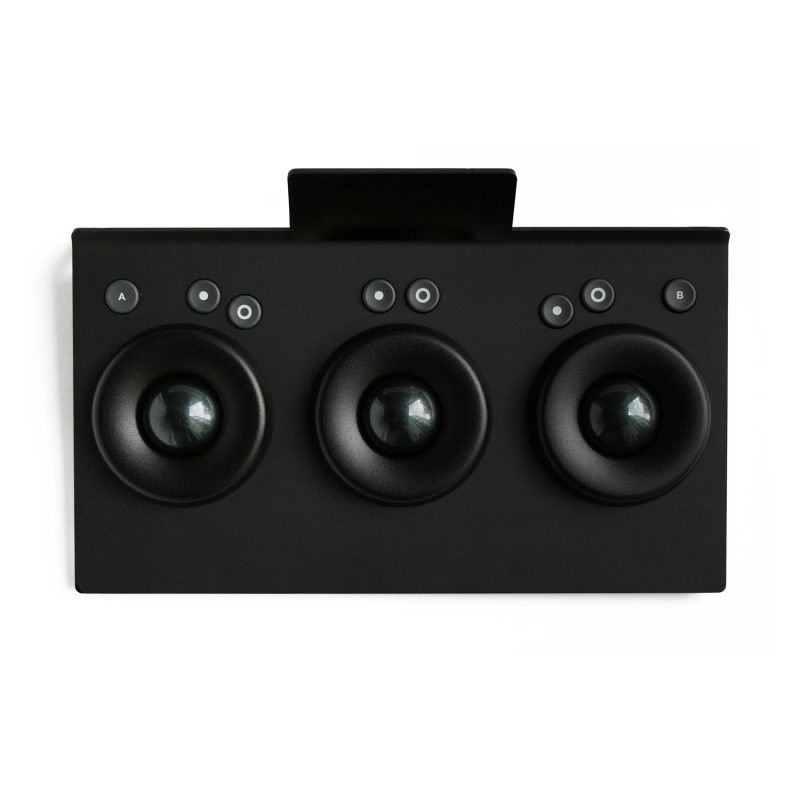
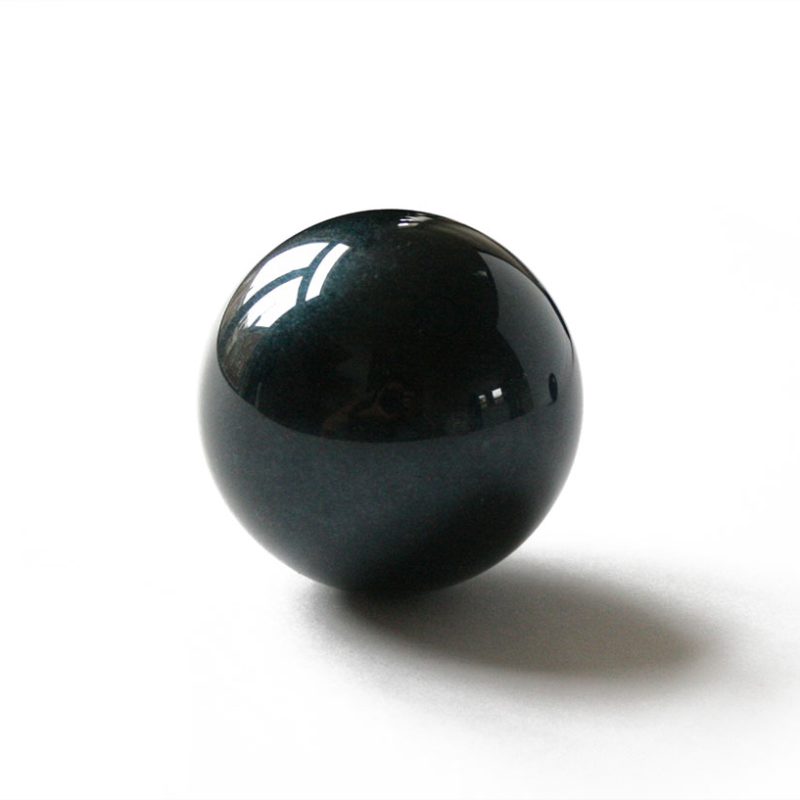
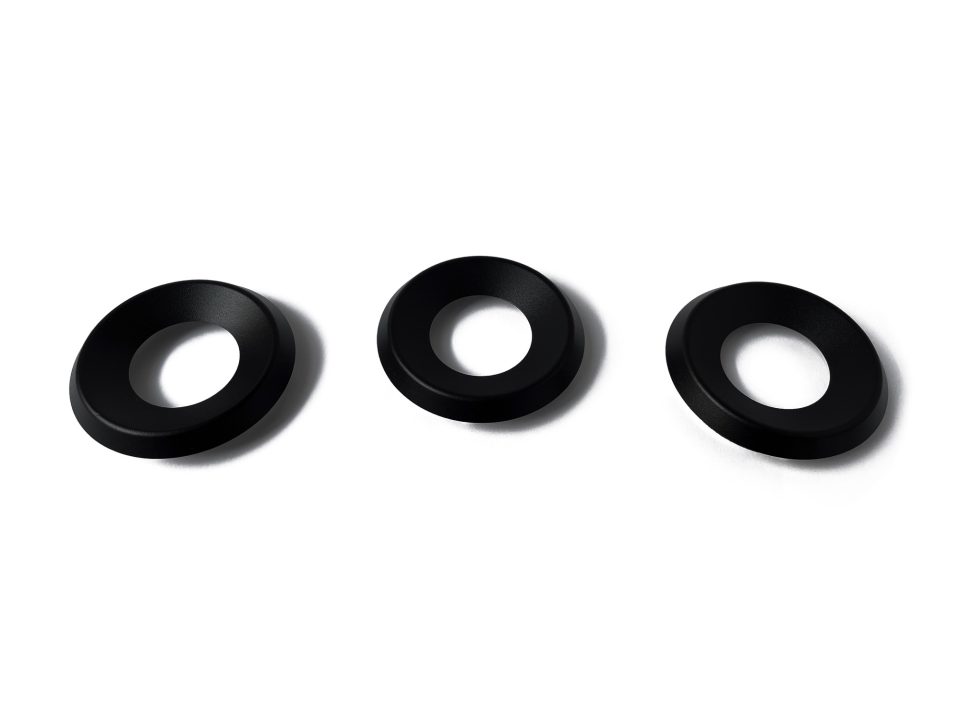
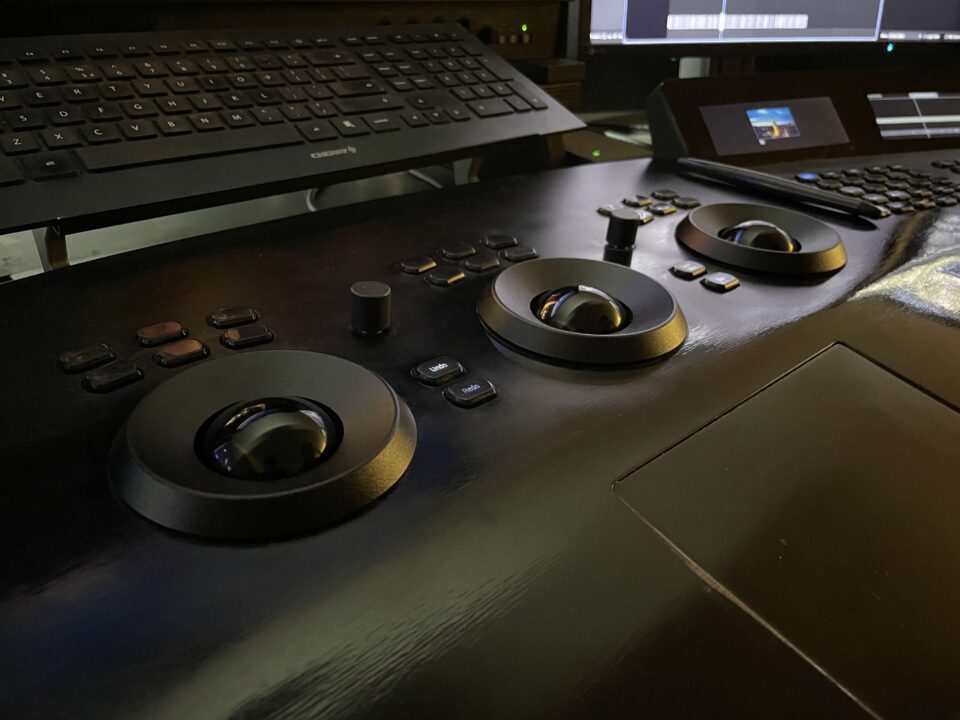
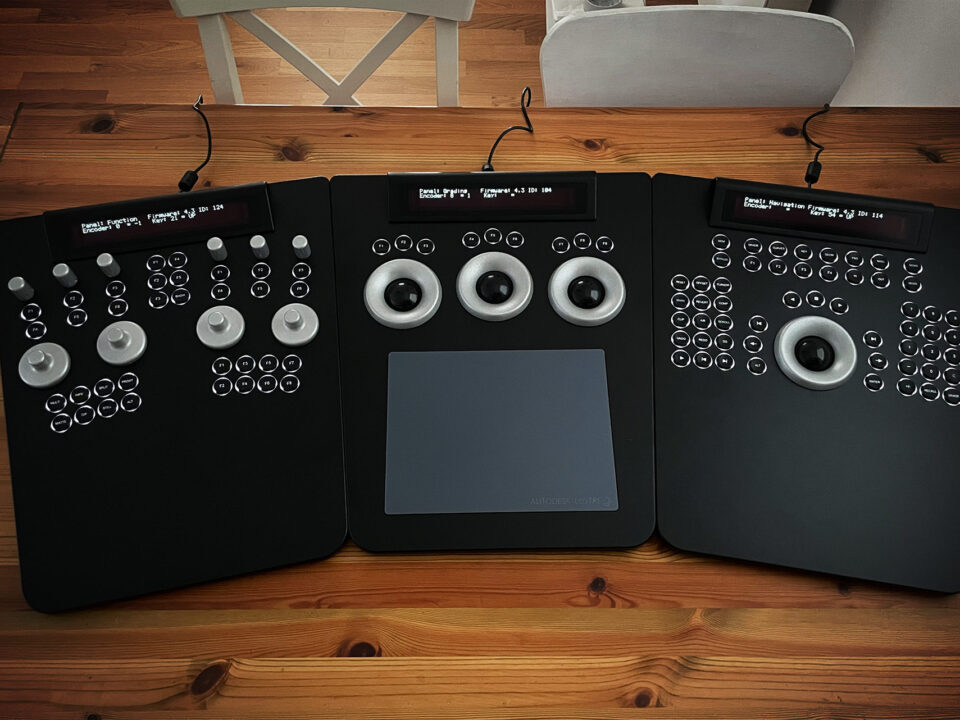
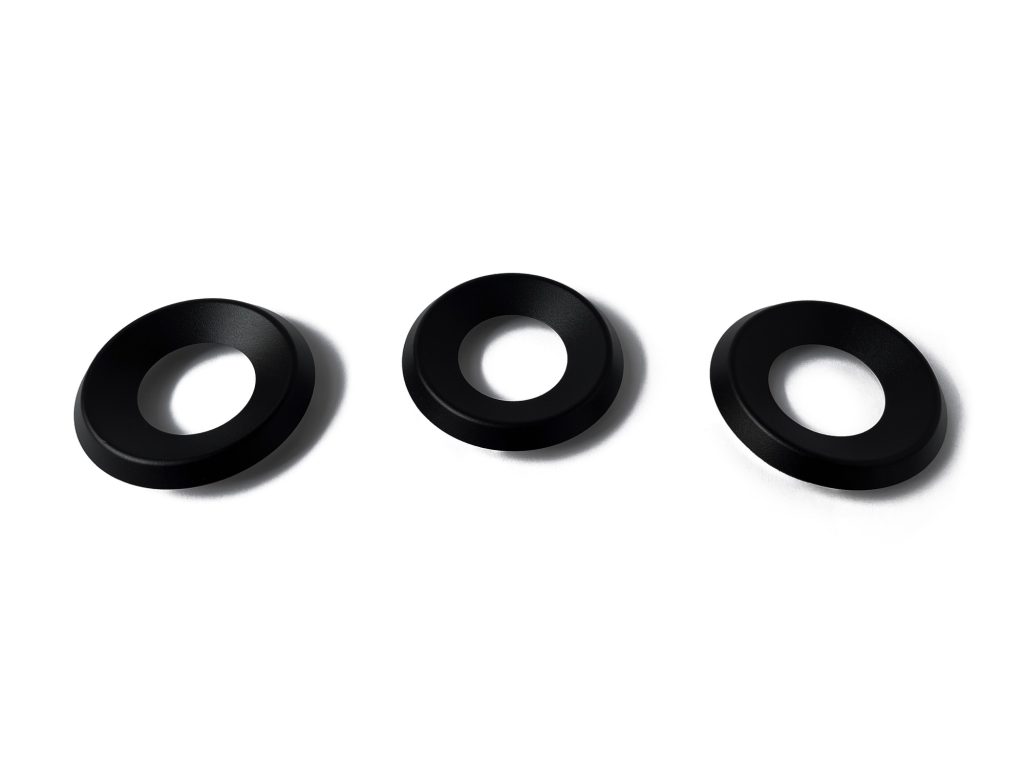
Since you apparently are in panel-upgrade-mode – check out our aluminium rings and dark petrol metallic trackerballs we offer for the Tangent panels:
-
Black Metal Rings for the Tangent Element panel (set of 4)
170,00 € (excl. VAT) -
Dark Petrol-metallic Tangent Element Trackerball (set of 4)
65,00 € (excl. VAT)
So this is what we did:
We’ve re-constructed the button keycaps for Tangent’s Element panel in order to 3D-print them with clear resin.
The resulting buttons were strong and flexible enough to be clicked onto the button mechanisms without breaking.
Cost for having them 3D-printed at a facility was around 60€ for 14 buttons –
not cheap, but not expensive for a fun project either.
Next, we looked for a USB LED strip online and decided to go with a cheap one (12€) from Amazon.
The good thing about these strips is, that they usually have a little remote, that would let us not only choose the color,
but more importantly dim the light down to a pleasant level.
Note, that on the pictures it has been cranked all the way up – although even then it wasn’t too distracting, really.
Lastly, we had to open up the panel and put everything in – roughly a job of 30 mins.
A note at this point: Don’t do it, if you don’t know what you’re doing.
You can easily break your panel at this step and lose your warranty. Anyways, it’s not too difficult, either:
Remove the silver stand (careful, the side-magnets will fall out), remove the bottom cover plate and the metal bracket in the back,
where the USB-port comes through.
Lastly, remove the 4 remaining screws on the PCB, but don’t take it off just yet – it still has the display connected to it!
To (very carefully) disconnect the flatband cable coming from the display, you have to lift the brown rim
of the cable socket on the PCB in order to “unlock” the flatband cable and be able to pull it out.
Please see the pictures on this – I recommend to use a plastic pry tool to lift the rim and move the flatband cable
out of its socket by gently pushing it down with the pry tool. You can then remove the PCB completely from the frame.
Now pull off the original button caps and replace them with the 3D-printed ones.
Put the PCB back into the frame (connect the flatband cable of the display again using the pry tool) and route the LED strip around the PCB.
It’s recommended to shorten it to the appropriate length first.
Getting the strip to fit in without obstructing any buttons is a bit finicky, but possible.
Don’t remove the tape on its back though, as that would reveal the glue (as it’s typically meant to be glued to the back of your TV or whatever).
We don’t want this, because it will make it impossible to put the metal cover back on, later.
But don’t worry, the LED-strip will be stuck between metal cover and PCB anyways – it has nowhere to go 😉 .
In our test setup, we just left out the rear bracket with the hole for the USB-port, in order to route the USB-strip’s cable out,
but you’re free to drill more holes into that bracket and put it back in.
Done: Button caps replaced, LED-strip pulled in, panel put back together.
Now just connect the USB LED-strip to a USB-port, or a simple phone charger and have your buttons light up.
Check our gallery below this article to see more pictures. We are thinking though, that it might look even cooler,
if we made the button caps opaque in the middle and only leave a translucent “ring” on the outside.
Maybe for next time 😉 .
Cheers,
Mazze


